

Первым делом, пролистав весь инет, попыталась найти выкройки. Но их очень мало и как по мне, то все не то. Пришлось пролистать весь Али, который наполнен этими игрухами, и обсмотреть этот амонг со всех сторон. Построила приблизительную выкройку по их игрушкам.
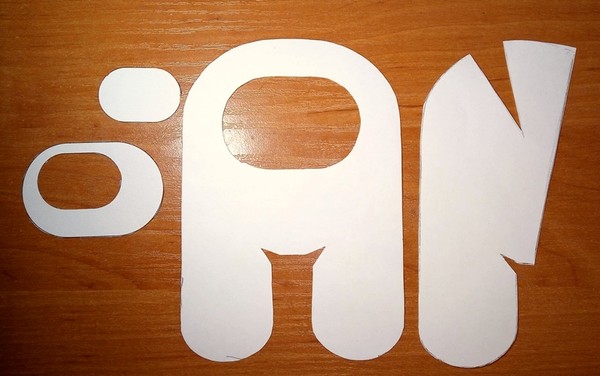
. это тоже не совсем то, что нужно, но ребенку игрушка нравится, значит все остальные амонги у нее будут такие же ))) Отталкивалась вот от этой выкройки, нарисовала ее в иллюстраторе, передок оставила, а задок просто разрезала пополам и сбоку расширила. Распечатывала на принтере в размере как 10*15.

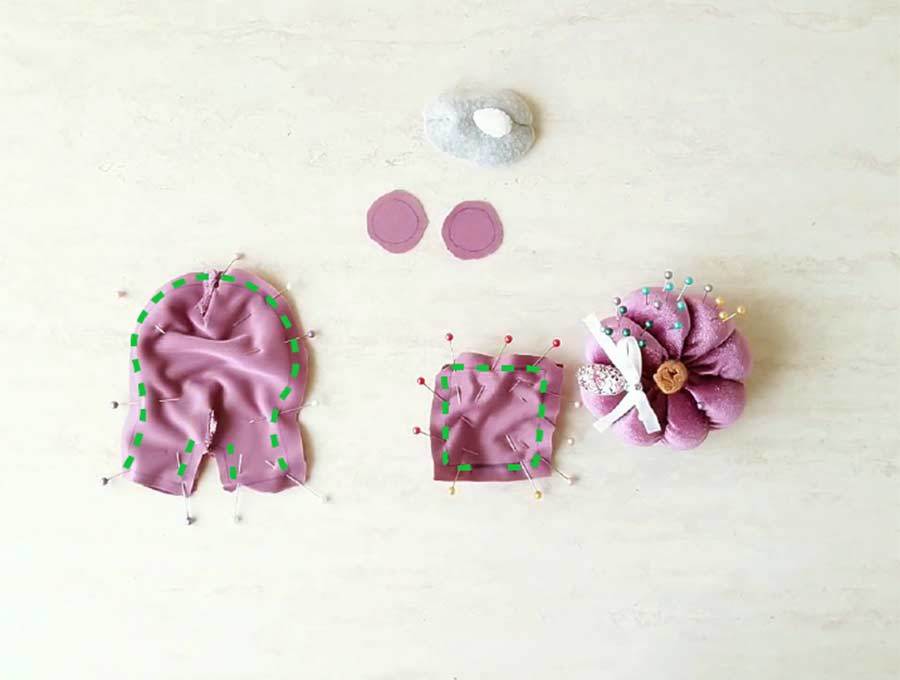
Выкраивала без припусков на швы.
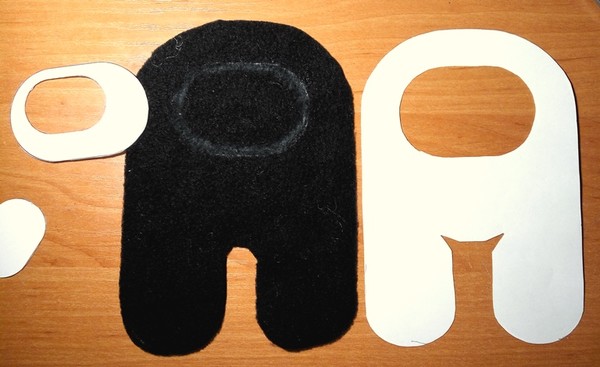
Размер игрушки маленький, поэтому вытачки сшивала вручную.
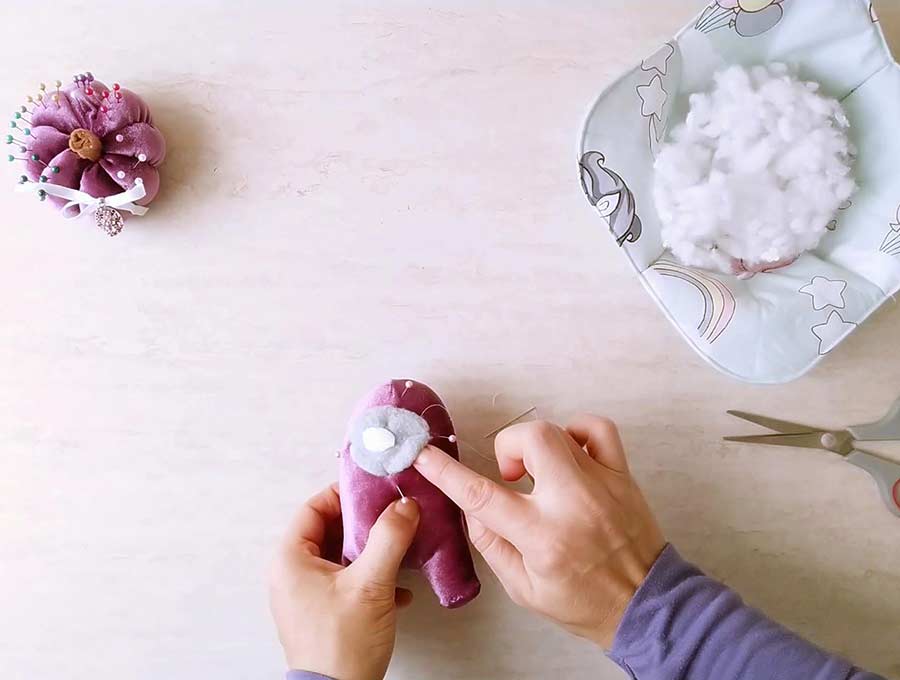
Перед тем как пришивать глаз? не знаю что это, я продублировала ткань. Флис очень тянется, и ткань при вышивке «ведет»
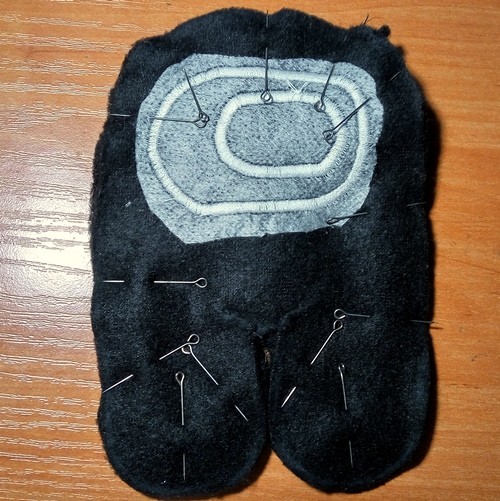
Сшиваю детали по самому краешку. Оставляю отверстие для набивки.

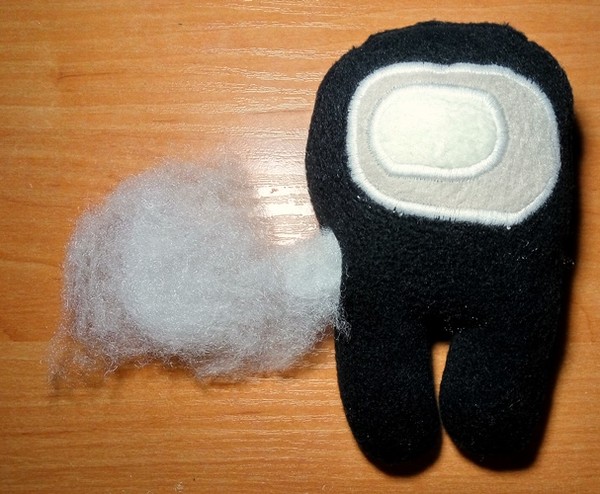
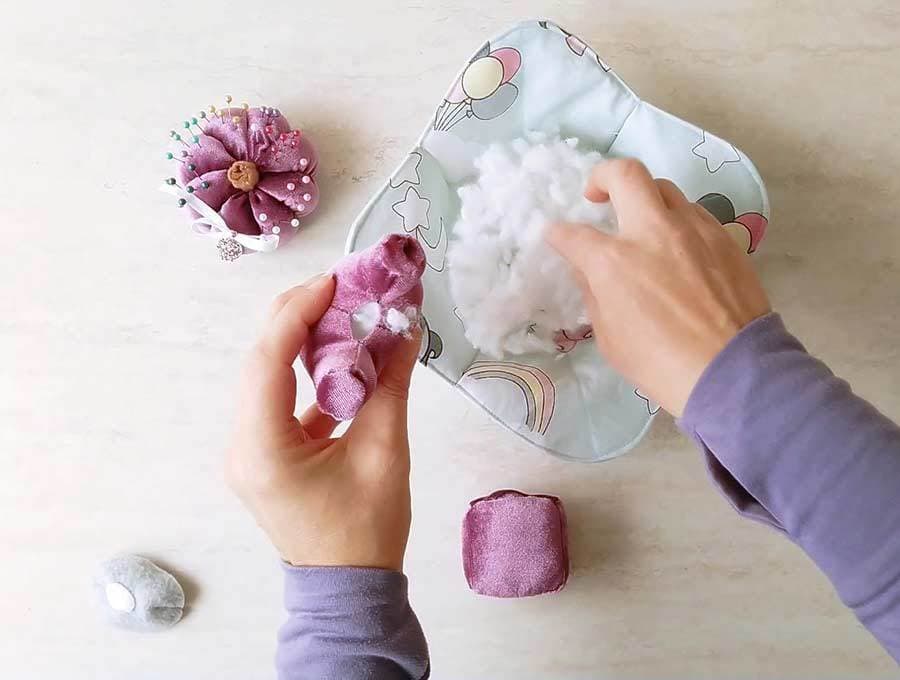
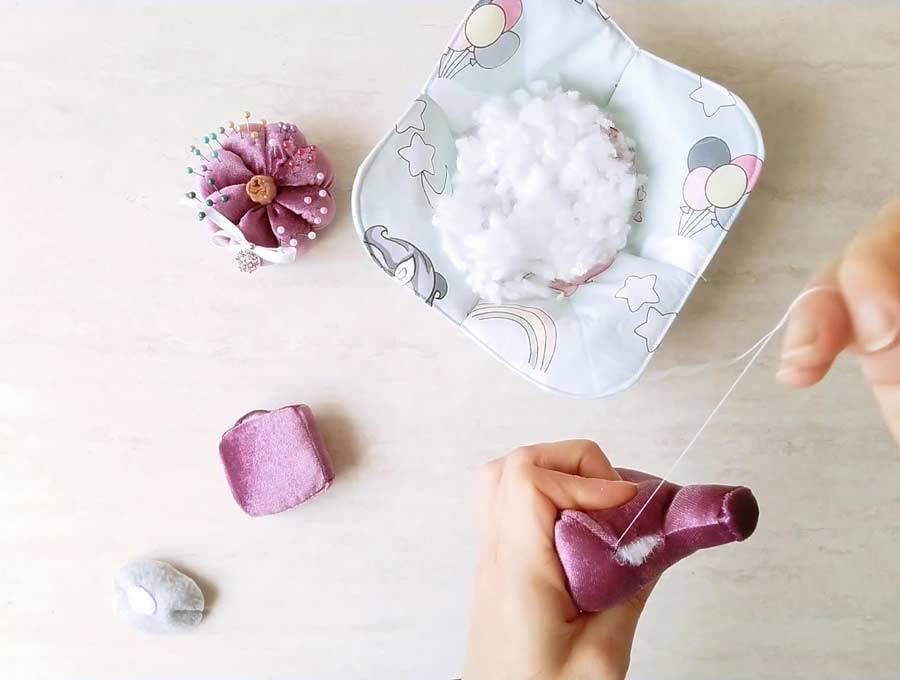
Набиваю плотненько-плотненько, так чтобы можно было им гвозди забивать ))) Тогда он выходит кругленький.
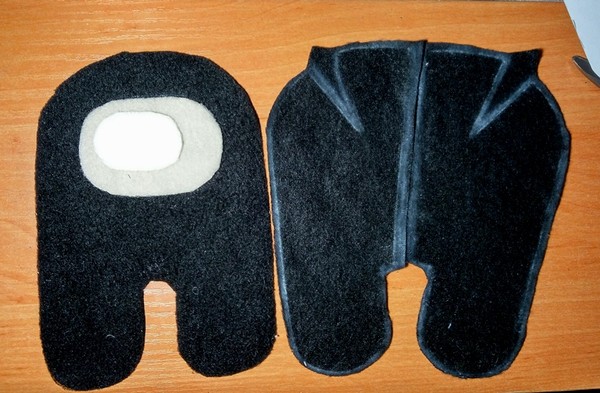
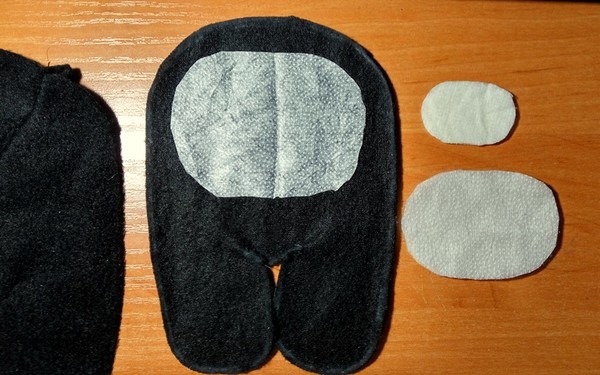
Перехожу к пошиву рюкзака? баллона? короче, я не понимаю эту игрушку. вот тут выкройки нет, на глаз прикинула размер для тела, просто вырезала два квадрата, один чуть больше для сшивания вытачек.
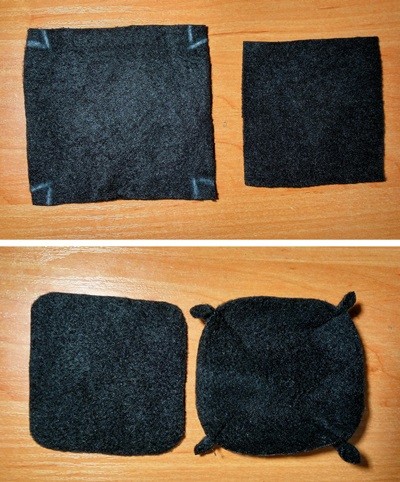
. по ходу дела закруглила края чуть меньшего квадрата, хорошо потом у меня все сшилось.
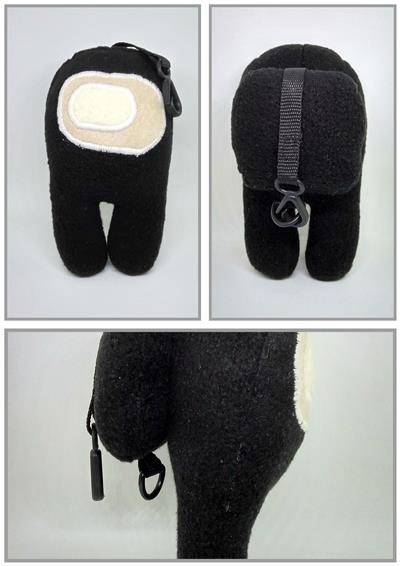
Для того чтобы ребенок смог куда-то прицепить эту игрушку, я решила вставить в нее карабин. Вот такие у меня в закромах лежали.
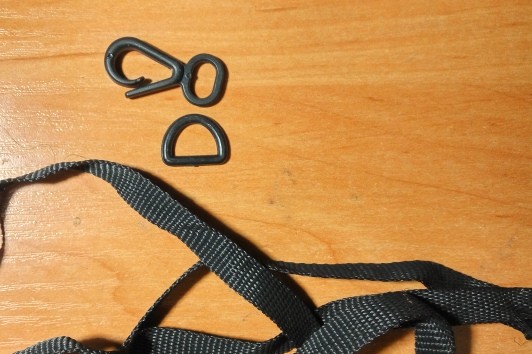
. но чтобы этот карабин не мешал при игре, я решила фиксировать ленту внизу рюкзака (Поля подошла и сказала «мама, это вообще-то кабинка») Вшиваю, фиксатор вниз кабинки, а карабин с лентой пришиваю к телу.
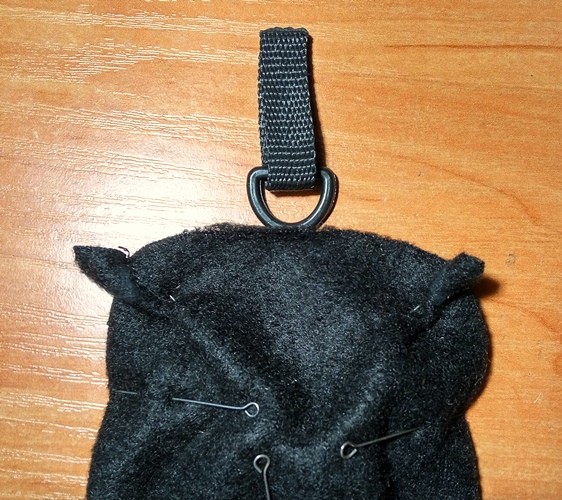
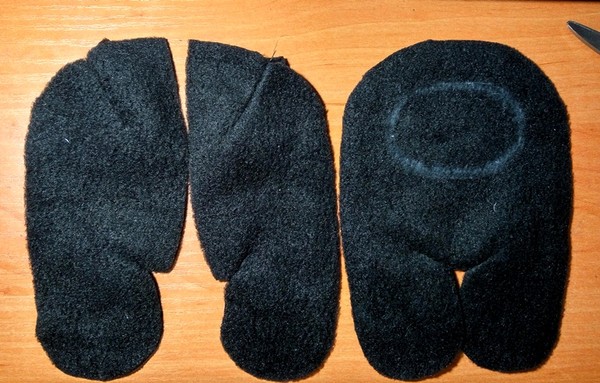
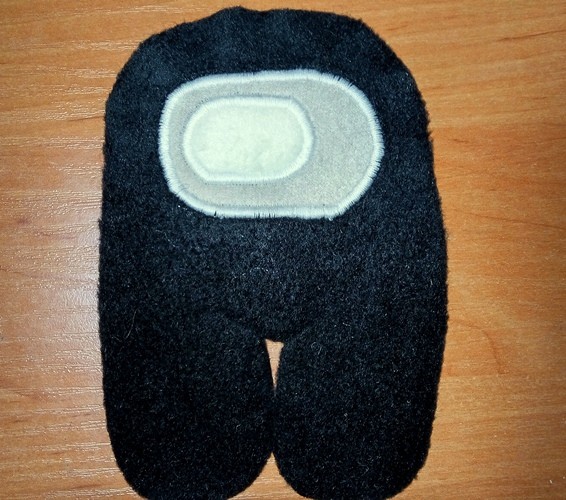
Набила кабинку и пришила ее крепко, по кругу к телу.
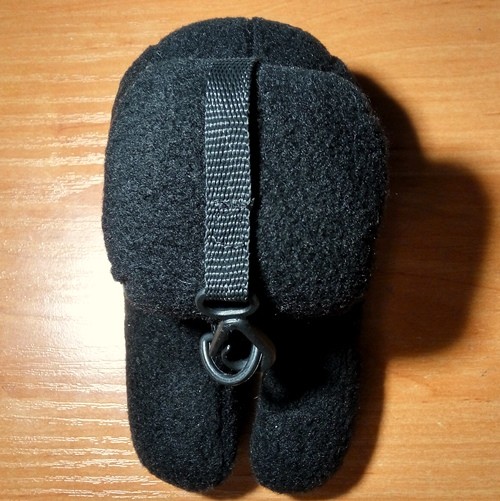
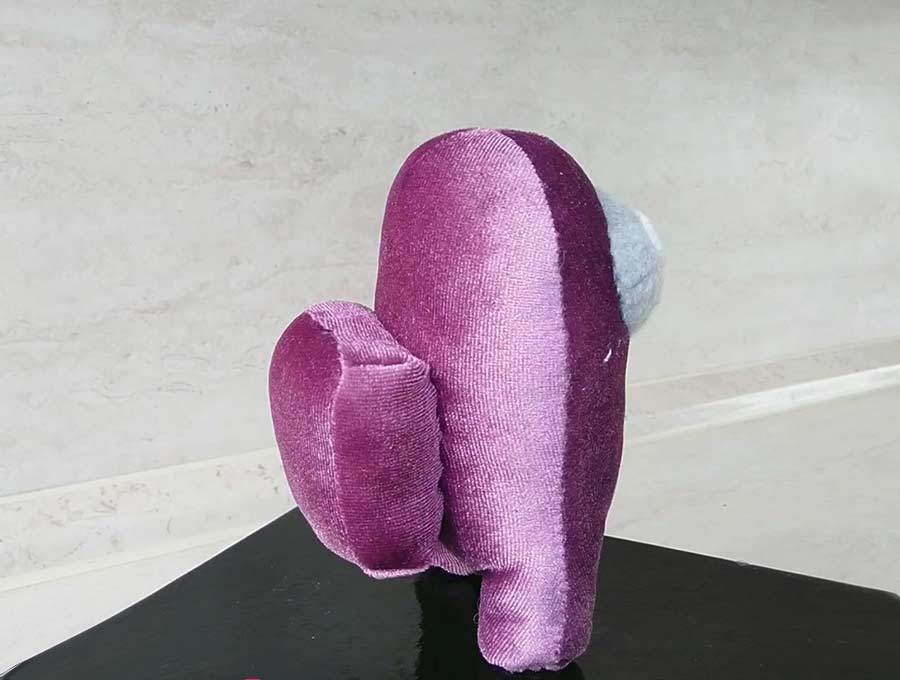
. вышло приблизительно так. Можно отстегнуть карабин и поцепить на школьный рюкзак, а можно убрать во время игры.
. вышло как-то так ) Ребенок счастлив, задача выполнена ))
Спасибо Всем заглянувшим! Хороших Вам праздников и семейных выходных!
Выкройка амонг ас among us
Хочу поделиться с вами своей выкройка амонг ас among us. Немного предистории создания этой вакройки. Мой ребенок ярый фанат этой популярной в мире инрушки among us и с недавнего времени в наш быт плотно вошли слова такие как импостер (это неизменно наш кот), амонг ас, предатель и т.д. И естесственно ребенок стал просить меня сшить мягкую игрушку амонг ассика. Я перевернула весь интернет в поисках выкройки, почему-то не нашла и решила действовать сама. Дело еще осложнялось тем, что ребенку требовался еще и игрушка как это помягче сказать мммм погибщего космонавта амонг аса. Потратив на построение выкройки и пошив игрушек несколько дней, спешу поделить с вами результатом своего труда. Кстати есть продолжение этой темы выкройка импостера предателя амонг асс https://ideikin.ru/vykrojka-predatel-imposter-among-ass-among-us/

Выкройка амонг ас among us космонавта
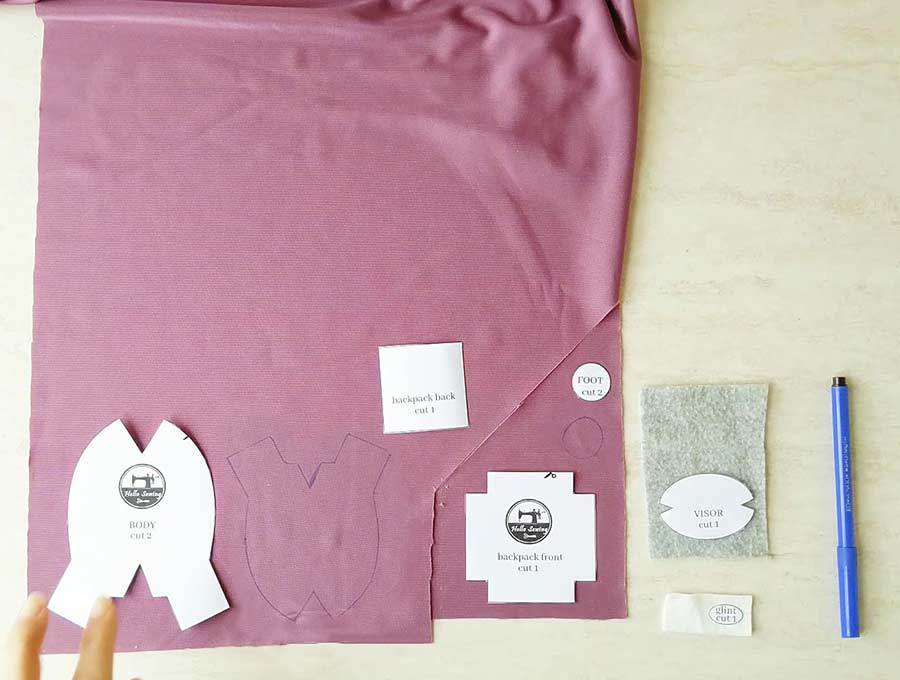
Материалы которые понадобятся для пошива мягкой игрушки амонг ас among us:
Выкройка амонг ас among us (кликабельна если кликнуть)


Порядок выполнения работы:
Космонавт амонг ас among us
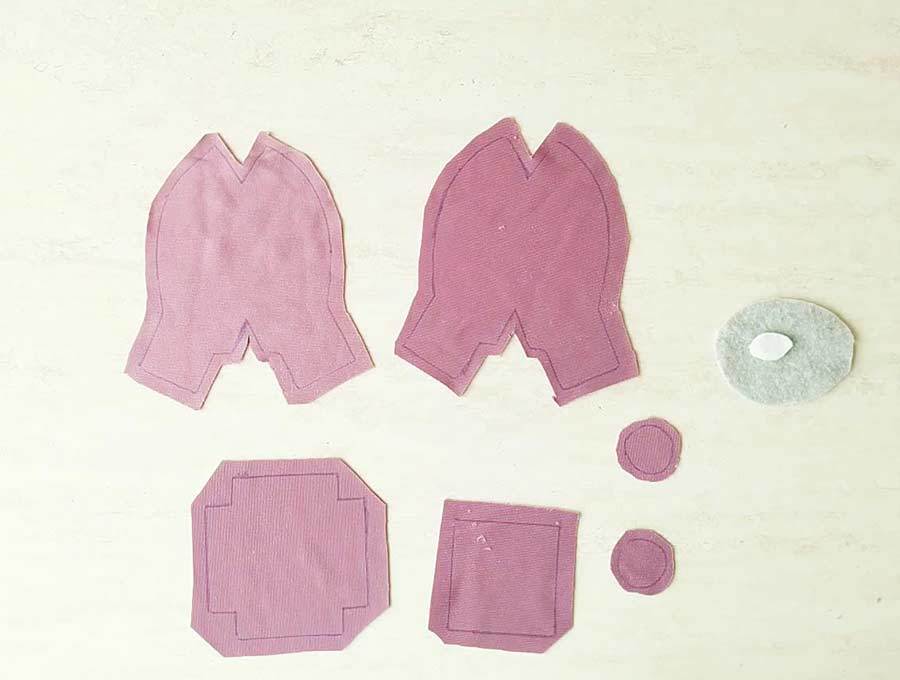
Распечатываем выкройку, вырезаем ее, обводим выкройку на ткань, не забываем оставлять припуски со всех сторон 0,5 мм. Выкраиваем две детали тела игрушки, одну деталь визора, две детали рюкзака.

К лицевой части игрушки приметываем и пришиваем визор, но не увлекаемся и не зашиваем до конца оставляя небольшое отверстие, через которое набиваем визор синтепоном для придания обьемности.


Две части тела сметываем и сшиваем, оставляя небольшое отверстие, через которое мы выворачиваем игрушку и набиваем синтепоном. Отверстие зашиваем.

Переходим к рюкзачку. Вырезаем детали, сметываем их и сшиваем, оставляя небольшое отверстие для набивки. Рюкзачок я приклеила к телу с помощь. клеевого пистолета, но его можно при желании пришить.

Жертва амонг ас among us Выкройка амонг ас among us

Для создания жертвы амонг аса используем имеющуюся уже выкройку. Сгибаем ее пополам и обводим на ткань нижнюю часть.
Для изготовления косточки предлагаю использовать плотный фетр — 2 мм, он хорошо держит форму.

Выкраиваем две детали кости и сшиваем ее вручную с лицевой стороны петельным или как его еще называют обметочным швом.
Читайте также: Выкройки для вязанных шапок

Полученную деталь очень плотно набиваем синтепоном. Две детали ног сшиваем между собой. Сверху к ним пришиваем деталь диафрагмы.
Не забываем оставлять небольшое отверстие, через которое можно будет вывернуть изделие и набить его синтепоном. Далее деталь кости можно было вшить в так называемую диафрагму, я это изначально планировала, но потом изменила свое решение и креклеила кость к диафрагме с помощью клеевого пистолета.
Вот то, что я планировала сделать изначально:

Но решила выбрать более легкий путь:

Некрасивое место вклейки кости я решила украсить с помощью приваливания шерсти коричневого и красного цвета. По-моему получилось очень правдоподобно.


Далее выкройку рюкзачка сгибаем пополам и выкраиваем две детали рюкзачка. Сшиваем их, набиваем синтепоном и приклеиваем к телу.

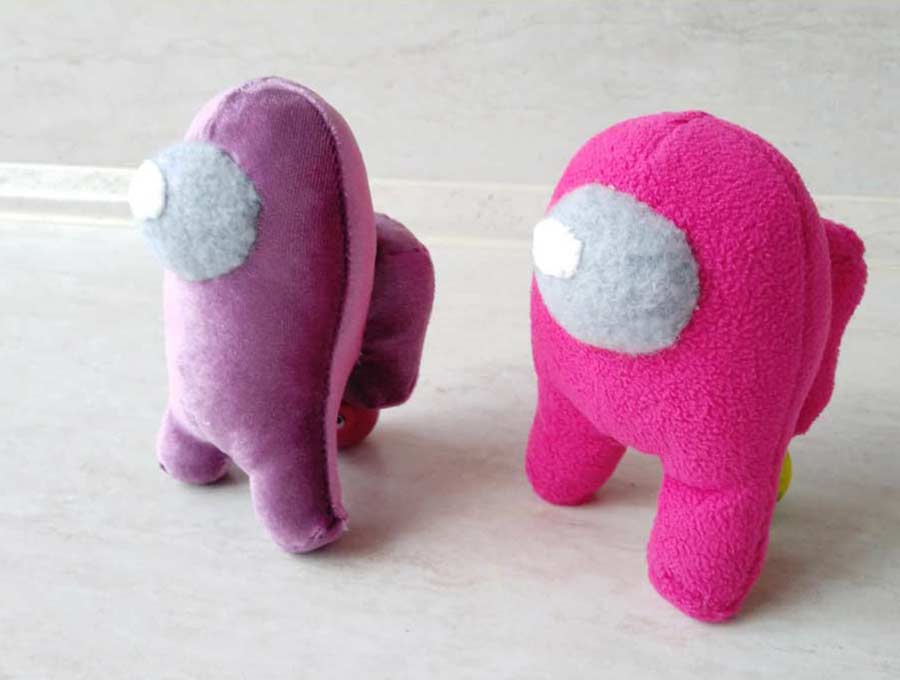
Вот такой получается жертва космонавта вид сзади

В продолжении этой темы: выкройка импостера амонго асс https://ideikin.ru/vykrojka-predatel-imposter-among-ass-among-us/
Будьте счастливы и дарите радость другим!
Among Us Crewmate Plush Pattern + VIDEO Tutorial
My teen came to me asking me if I can sew him up an Among us plushie. Say whaat? Actually, sew him something? He is usually not asking me to sew stuff for him, so I jumped at the chance. I have never heard of AMONG us game, but he informed me that it has been around for few years now and it is gaining popularity ever since the first lock down. Quickly he informed me about all the AMONG us characters – the crewmates and the impostors, what a dead body is and we got to pick up the colors. I pulled out the suitable fabrics out of my stash and we got together to choose a color for the among us crewmate plushie he asked for.
If you are playing the game, you already know the variety of colors these characters have, but it was all new to me – blue, cyan, pink, purple, green, red, orange and bright yellow. He looked around and decided on purple standing crewmate. Great! He then proceeded to tell me more about the game, the crewmate’s tasks, what SUS is, and how crewmates can vote out the Impostor. These little creatures are not difficult to sew at all, even from complete beginners. If you can sew a straight stitch, you can make this adorable standing crewmate plush. If you can’t – just watch my video – I’ll show you every little step. And finally -if everything else fails then ask mom or granny to do it for you.

Below you will find my step by step among us crewmate plush pattern and written tutorial with VIDEO instructions for all the visual learners.
We occasionally link to goods offered by vendors to help the reader find relevant products. Some of the links may be affiliate meaning we earn a small commission if an item is purchased.
How to make a Standing Crewmate Plush
Supplies and tools
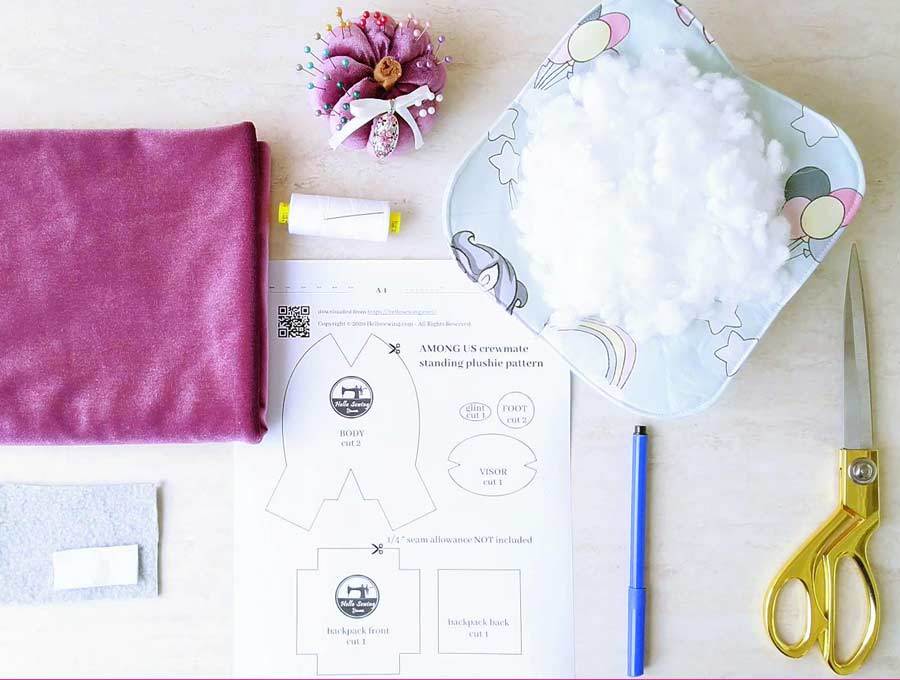
- main fabric – minky, velvet or fleece in the color of your choice 15″x 10″- purple, blue, cyan, green, red, orange, yellow, brown
- light grey/light blue and white fabric – little scraps for the visor and glint
- matching thread thread
- among us plush template (free download below)
- polyester stuffing
- scissors
- sewing clips or pins
- fabric pen or simply a sharpie
- handsewing needle and white thread
- sewing machine (or you can handsew these)
AMONG US character standing crewmate PATTERN
Follow us for free patterns & tutorials!
How To Sew a Crewmate plushie
Watch the diy standing among us crewmate video first and then follow the written step by step instructions below.
Please enjoy and don’t forget to Like and SUBSCRIBE over on YouTube to be kept up to date with new videos as they come out.
Sewing the standing crewmate VIDEO TUTORIAL
INSTRUCTIONS:
STEP 1: Prepare the standing crewmate template
Download the among us standing plushie pattern from the link to the template above. Print it at 100% (no scaling at all) on one piece of paper. Cut out pattern pieces, trimming any excess paper.
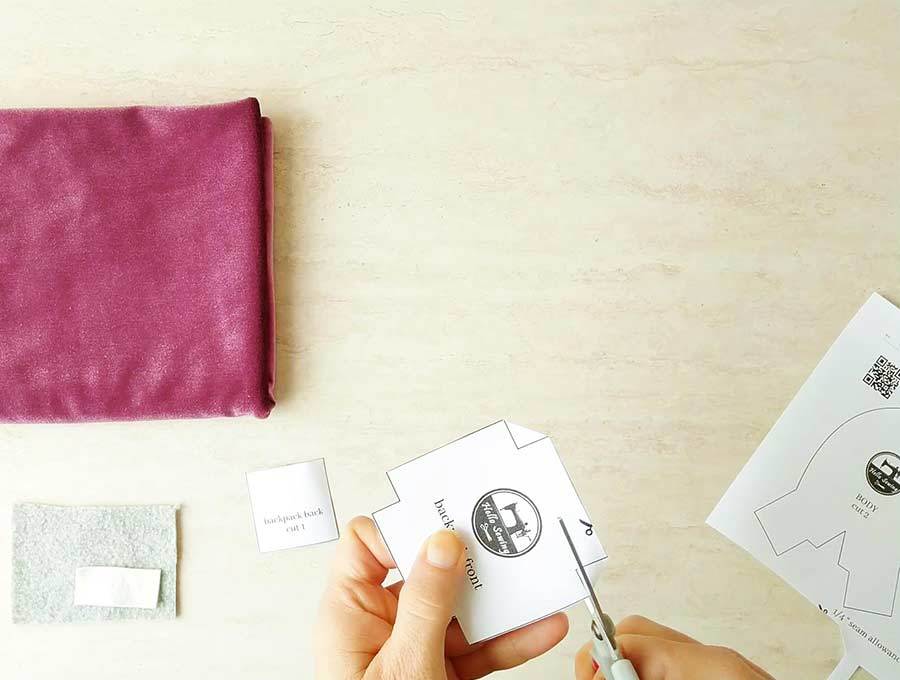
STEP 2: Trace standing plushie pattern pieces onto fabric
Trace plush pattern on the back of the fabric. Note that the seam allowance is not included in the pattern, so you will have to leave 1/4″ seam allowance around each piece to account for the seam allowance. Trace as follows:
- MAIN FABRIC: main body part (x2), foot (x2), oxygen tank-front, oxygen tank-back
- LIGHT GREY/BLUE FABRIC: VISOR
- WHITE FABRIC: Glint
Читайте также: Выкройка лестницы для собак
The only fabric piece you will cut according to pattern (without adding seam allowance) is the glint.
STEP 3: Cut out the fabric
Cut 1/4″ from pattern lines (except for the glint, that you cut according to pattern). If you’ve traced everything correctly, you will have 8 fabric pieces to work with.
STEP 4: Pin first darts
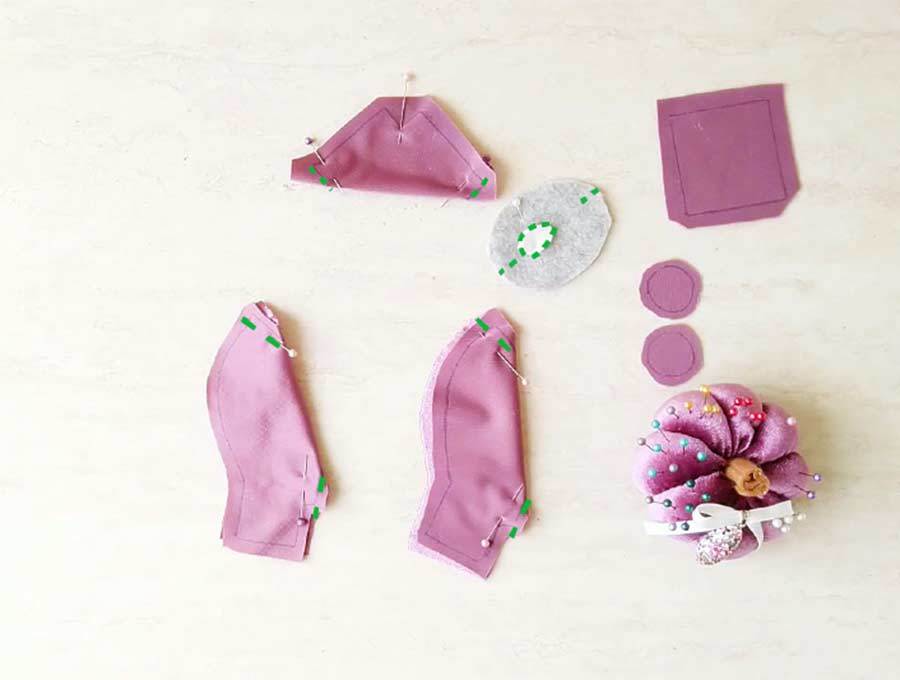
You will need to pin the first darts on the oxygen tank front and both main body parts.
- Fold oxygen tank in half diagonally, with the right sides facing and pin darts.
Let me share one tip with you that will help you pin and sew darts precisely. Take a pin and push it near the top of the dart line through both layers of fabric. Check whether the pin went through the dart line on the back layer. If that is not the case, pill the pin a little bit and adjust the back layer. Check again whether the dart lines are aligned. If they are, hold the fabric tightly pull the pin out and pin the fabric about ¼ inch from the dart line so that you can sew without removing the pin.
These darts are so tiny that using this trick really helps
- Fold main body pieces in half with pretty (right) sides together and pin darts. If you have the time you can use the trick I shared above.
STEP 5: Sew
Now stitch the glint to the visor, and the darts of the visor, main body part and the oxygen tank. Do it in the following order.
- Sew glint to the visor. Place the glint on top left of the visor accounting for the seam allowance. See pattern for suggested placement. Thread white thread into the needle and knot the end. Push the needle under the glint and pull it from above, as near to the edge of glint as possible. Use whip stitch to attach the glint to the visor
- Fold visor in half and sew both darts. The pretty (right side) should be inside the fold. Use backstitch to sew both darts. Knot your thread at the beginning and end of each seam.
- Sew the two darts we pinned that were part of the front part of the oxygen tank
- Place main body parts on top of each other (right sides facing) and pin them together. Don’t sew the feet yet as we need to attach the feet circles to the legs.
- Also leave the middle of the bottom side as we will use this opening to turn the crewmate body around and fill it with stuffing.
- Sew the oxygen tank darts. Unfold oxygen tank, fold diagonally to the other side, pin and sew the darts. Trim seam allowance of the darts down to 1/8 inch to reduce the bulk.
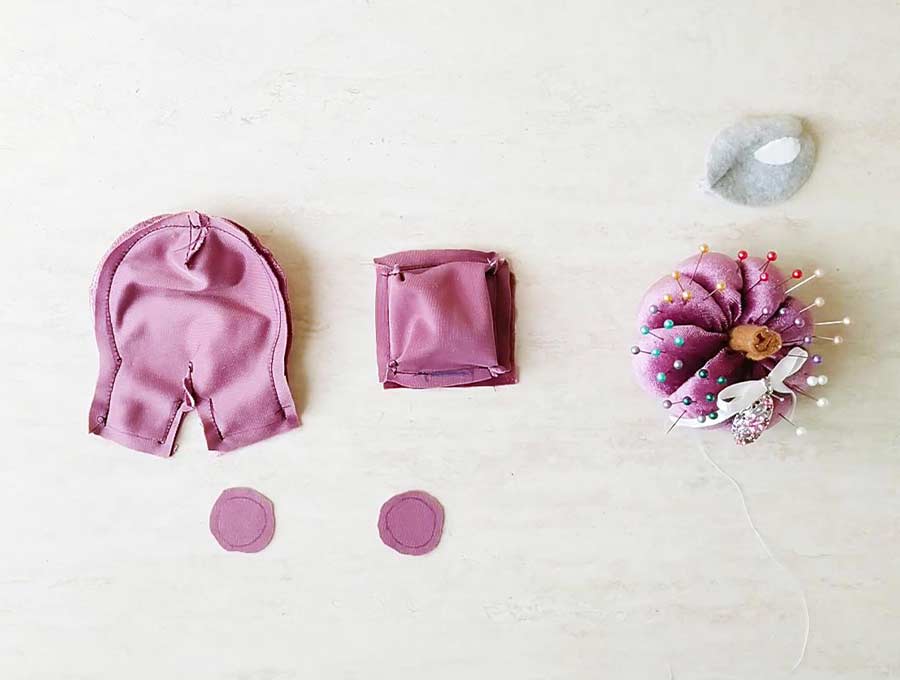
image also shows fully sewn oxygen tank
STEP 6: Sew the oxygen tank
Pin oxygen tank back to the front part and leave 1-inch gap for turning. I usually mark this gap either with double pins or with a fabric pen. Sew around either using a backstitch or your sewing machine to speed up the sewing process a bit.
STEP 7: Sew the body of the crewmate plushie
Sew the plushie main body parts as shown and be careful to leave 3 gaps unstitched or you’ll have to use the seam ripper later (been there, done that)
Pin the feet to the crewmate body and handsew using a backstitch. The feet are so tiny that I don’t recommend sewing them on a machine even if you have one, as it will be much difficult

STEP 8: Turn right sides out
Turn the oxygen tank around
Читайте также: Выкройки деда мороза в школу
Turn the standing crewmate body right side out
STEP 9: Stuff body and tank
Fill in the oxygen tank with the polyester stuffing. Do not fill it too tight, just enough.
Fill in the standing plushie body with the stuffing. Make sure to stuff it well and fill in the legs well – you will be surprised at how much stuffing it can take. What I like to do and it helps stuff easier and faster is to roll a handful of stuffing with my hands to deflate it a bit and then to fill it using my fingers. Watch the video to see how I do it. I have made quite a bit of stuffed animals (this sock monkey was the last stuffed animal I made) so I can now do it in my sleep, but if you are new to that you might learn a trick or two that will help you get through this part faster.
STEP 10: Sew the gaps closed using ladder stitch
Sew the openings of the tank and the body using a ladder stitch. If you are new to this stitch watch the video carefully (you can slow it down in YT if you prefer). When you have stitched the gap, pull the thread to close the gap. Stitch a couple of times, then push the needle through the loop of the thread twice to make a knot. Push your needle through the plushie an inch or so from the end of the stich. Cut the thread and it will disappear inside the body
STEP 11: Sew tank to the body
Pin the tank to the back of the crewmate using 4 pins – one on each side. Sew both parts together using a whipstitch (the most basic stitch)
STEP 11: Attach the visor to the head of the crewmate
Make a running stitch around the visor and do not knot or pull the needle out of the thread. Pull the thread to gather the visor seam allowance slightly so you can fold it under. With the needle still attached to the thread, pin the visor to the head of the crewmate. Make sure it is centered horizontally. Now sew around the visor to attach it to the body. Stop 1/2 inch from the beginning, stuff the visor with a bit if polyester stuffing and then proceed to sew it closed.
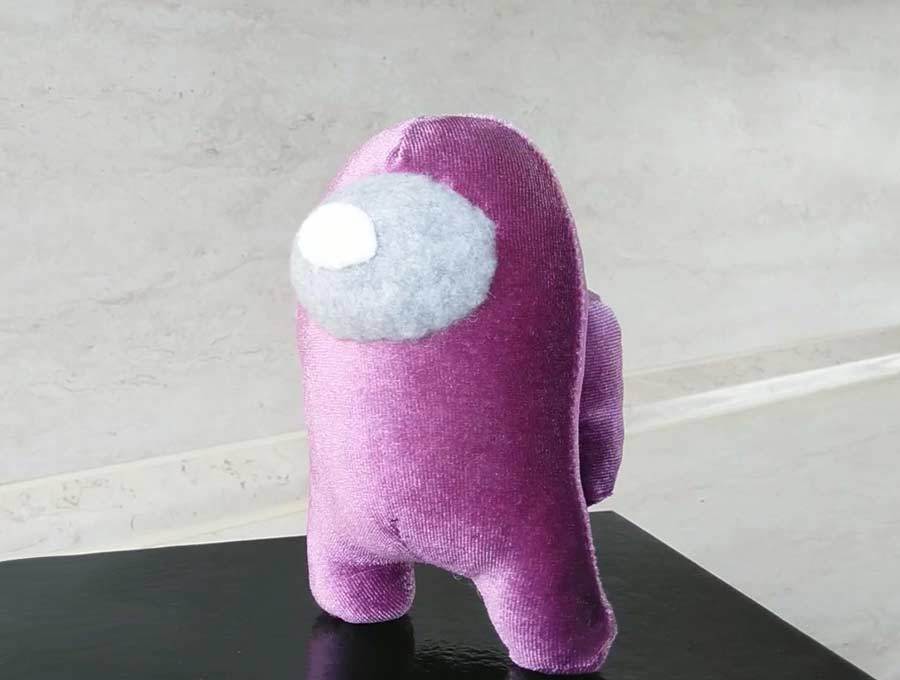
Voila! The purple among us plushie is ready.
It’s adorable, isn’t it? My standing crewmate looked so lonely that I decided to make him a pal (pink crewmate). They spend all their time together, taking up tasks and looking for the Imposter among us. They seem stuck as he is nowhere to be found.
Shh.. I must have admitted I am yet to made it, but it breaks my heart to do it. Do you think I should make the Impostor plushie and if yes – what color will suit him best?
UPDATE: Thanks for voting. Here’s the Impostor plush pattern
My crewmates keep searching so hard to find it that I think they deserve to find him. Let me know your thoughts in the comments. I would love to know what you think.
Did you make the Among us standing crewmate plushie? I made the crewmate plushie pattern with as little parts to sew as possible so that even a complete beginner can make it. At the same time, I tried to keep the original look. The first crewmate I made had his feet too far apart from each other, and looked like he was squatting, and his oxygen tank a bit too high on his back. Don’t laugh at me – I thought it was a backpack… The teen pointed the flaws immediately and I fixed them. Ahh.. you live and learn.
- Which is your favorite crewmate color?
- How long have you been playing AMONG US?
- Do you prefer to be a Crewmate or the Impostor?
Do you like this? Pin for later:

Wanna be friends? Click HERE and follow me on Pinterest
- Свежие записи
- Балкон в многоквартирном доме: является ли он общедомовым имуществом?
- Штраф за остекление балкона в 2022: что это и как избежать наказания
- Штраф за мусор с балкона: сколько заплатить за выбрасывание окурков
- Оформление балконного окна: выбираем шторы из органзы
- Как выбрать идеальные шторы для маленькой кухни с балконом